Make Plantable Seed Paper
Make Plantable Seed Paper
Why Make Plantable Seed Paper?
Making your own plantable seed paper creates an opportunity for wonderful gifts. In addition, it is a great creative project for kids and adults. The best part is that you can grow a variety of flowers and herbs in a fun way! The process to make plantable seed paper isn’t glamorous, but it is kind of fun! Plan to create paper in an area that will withstand a mess. It helped me to have trays and drop cloths to catch the water.
Without a doubt, it is much more fun when creating it with friends! I’m sure kids would love it as well. Pinterest is full of ideas of how to create seed paper for events such as weddings or parties. This blog will discuss the basics.
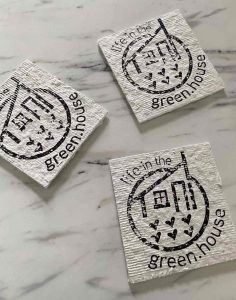
I wanted to created a branded look for Lifeinthegreen.house, that encapsulated a little of what it is about: eating, growing and living naturally. A huge part of the love, is growing. Therefore, it only made sense to create business cards that were made with seed paper.

Gathering Supplies – Step 1
I use shredded paper, odd and ends of tissue paper and other lightweight scraps for this project. Keep in mind whatever was printed on the paper you use, may show up. Usually it is visible in ways you won’t expect. Gather all of your paper that you will experiment with and put it into a bucket or bag that you can easily reach into.
Find an old blender that still works but that you will not use for food later on. You can pick up a used blender at thrift stores or rummage sales.
It is important to have a large tray and a couple of large screens to dry your paper on. It is helpful if your screens are slightly smaller than your tray. The reason for this, is that your paper will be laying on the screens, and initially will be very wet. It is never a bad idea to put drop cloths under the table/workspace that you are working in.
One last supply that was helpful for me, was 2 pieces of wood that I used, on the bottom and the top of the screen and paper, to help flatten it before it started drying. I used old cutting boards that I had and no longer needed.
Determining the seeds may take some time. Wild flower seeds and spinach seeds have worked well for me so far. I am still experimenting with herbs and lavender seeds at the moment. Each seed may be tricky in that you do not want it to germinate (soak too long in water) while it is in the paper as it is drying. It may or may not make a difference in your paper so experimenting is always the plan for me.
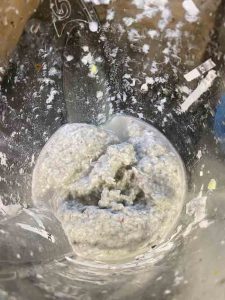
Blending the Paper – Step 2
After you are all prepped with supplies and seeds at hand, it’s time to blend the paper. Again, this takes some experimenting. I usually start with about 2 cups of shredded paper and about half that amount with water. Utimately, you’d like to have a soupy oatmeal texture. Blend until paper remnants are blended. If the paper appears to be a color you do not want, now is the time to add other colors of shredded paper to change or alter what you see. When the paper dries, it will lighten somewhat.
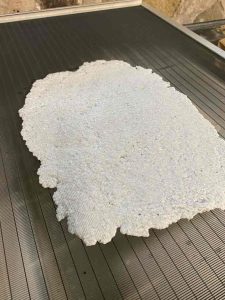
Drying the Paper – Step 3
Begin the drying process once you are satisfied with your oatmeal/porridge-like substance. Pour the mixture onto your screen. Spread out mixture to about 1/4” if possible. This makes for a nice thickness for your paper. If it looks clumpy and uneven, thats ok! At this point, I like to sprinkle my seeds. Either lightly work in the seeds or just sprinkle on top. This is where I place wooden boards on both the top and bottom of the screen/paper. The flattening process will help to even out the paper. Once the desired flatness is achieved, allow the paper to dry. I dried my paper in the basement where we always have a fan circulating the air. My paper usually dried within a week. However, your paper’s dryness will vary depending on environment and the thickness of your paper.
I would love to hear how your paper-making process went! Also, if you have suggestions, feel free to comment!
Seeds and Equipment that may be helpful:
Gardening gloves (these are awesome)
Some links are affiliate links, which means I make a small commission at no extra cost to you. See more info here.
The process to make plantable seed paper isn't glamorous, but it is kind of fun! Without a doubt, it is much more fun when creating it with a friend! I'm sure kids would love it as well.
This is such an awesome idea! So beautiful! I think it would be great for a wedding. Maybe have all the bridesmaids get together to make them and then use them as place cards for guests. Seeds aka new life + love = marriage. (get it?)
yes, absolutely!!