How to Grow Microgreens (or sprouts) Without a Kit
How to Grow Microgreens (or sprouts) Without a Kit
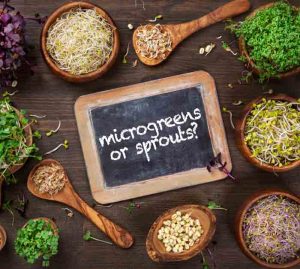
Why would I want to grow microgreens or sprouts?
Once you have experienced these delights, you’ll want to show everyone how to grow microgreens (or sprouts) without a kit. Growing and eating microgreens could boost your immune system and increase your nutrition intake. These greens are 4 to 40 times as much nutrition per volume as their mature counterpart, depending on the seeds you grow. From broccoli to kohlrabi, there are several varieties of microgreens and sprouts available! There really are great kits out there to help get you started but with a little creativity, you can grow microgreens in different ways. You may even be able to grow with items you already have in your house (that’s what I like to do!).
How to Grow Microgreens Without a Kit (2 ways)
First way (without soil)
Line container with paper towel. I prefer 3 layers to absorb the water if you are growing in a container without drainage. The key is to put enough water into the container to absorb and evaporate. Too much water too often, without drainage will produce mold. Sprinkle a thick layer of seeds onto the paper. Cover seeds and paper towel with a plastic dome or plastic wrap to create a greenhouse effect (optional) and give the seeds a chance to germinate.
Second way
Using any container, spread a layer of soil in it and spread a generous layer of seeds on the top. After seeds are on the soil, go ahead and spread another layer of dirt on top of the seeds. Gently water the seeds. Cover with a dome, or plastic wrap. Water when the soil feels dry to touch. Remove or plastic cover when sprouts begin to grow about an inch tall.
How are these different than sprouts?
If you get a chance, take a look at this article. She writes so lovely, and the information is super helpful if you are looking for supplies. She says this:
Microgreens are different from sprouts.
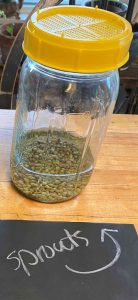
Sprouts are germinated seeds, grown without soil, usually in a jar with a screen for a lid. You eat the seed, root, stem, cotyledons and any undeveloped leaves. They are usually grown in dark and damp conditions, and they have a tendency to develop mold or other problems if not well drained.
Microgreens, by comparison, are grown in soil and need at least a few days of good light and air circulation. You eat just part of the stem and the leaves, leaving the roots in the soil. They taste more like full grown plants or vegetables, but just more tender and delicate.
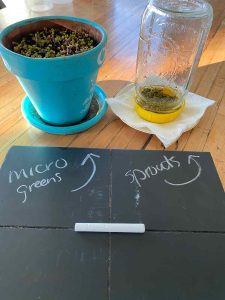
Microgreens starting to grow next to sprouts in the beginning stages after soaking.
How long does it take for microgreens or sprouts to grow?
Depending on the variety grown, microgreens are usually ready in about a week to three weeks. They are usually 3/4” to 2” tall. Start by sprinkling a nice think layer of tiny seeds such a broccoli. If you sprout peas, you can use less, just have peas close together. For sprouts, the time needed is a little shorter. If you want to eat them smaller, it will take just a few days to a week or so.
How to Grow Sprouts
Sprouts are usually ready much quicker, as they are best enjoyed when they are still very young. For sprouts, put two tablespoons of your seeds into a jar. Pour enough filtered water into the jar, to cover the seeds plus an inch or so above. Allow tiny seeds to soak about 2 hours. Allow larger seeds (such as mung beans) to soak about 4 or 5 hours. Put a strainer lid on top of the jar (or use a thin pieces of cheesecloth with a rubber band, over the opening). Drain the water. Allow the jar and soon-to-be sprouts to drain upside down on a plate with a paper towel underneath. Allow to sit in a dark space for the first 24 -48 hours until the seeds begin to sprout. Then you may move to a sunny spot until the sprouts are at a size you’d like. Continue to rinse the jar with fresh filtered water everyday, and allow to drain. The sprouts are already ready to eat when you see the little “tails” begin to come out of the seed.
How to Grow Microgreens (or sprouts) Without a Kit supplies/recommended resources here:
Here is a great place to order seeds.
Strainer Lids for jars (Sprouting)
Another option for straining (Sprouting)
Trays for growing Microgreens with Domes
A Kit if you would rather have everything together
Good resource for explaining and growing sprouts versus microgreens
Another great resource for information
Great resource for buying seeds: High Mowing Seeds- Microgreens
Other Equipment you might like:
Gardening gloves (these are awesome)
Some links are affiliate links, which means I make a small commission at no extra cost to you. See more info here.
When you grow and eat microgreens, you could increase your nutrition intake. These greens are 4 to 40 times as much nutrition per volume as their mature counterpart, depending on the crop. From broccoli to kohlrabi, there are several varieties of microgreens to grow!
Ingredients
Seeds
Jar and straining lid for sprouting
Tray and drainage tray with dome for microgreens
Soil for microgreens or
Paper towel base for microgreens
Instructions
Sprouts:
Sprouts are usually ready much quicker, as they are best enjoyed when they are still very young. For sprouts, put two tablespoons of your seeds into a jar. Pour enough filtered water into the jar, to cover the seeds plus an inch or so above. Allow tiny seeds to soak about 2 hours. Allow larger seeds (such as mung beans) to soak about 4 or 5 hours. Put a strainer lid on top of the jar (or use a thin pieces of cheesecloth over the opening). Drain the water. Allow the jar and soon-to-be sprouts to drain upside down on a plate with a paper towel underneath. Allow to sit in a dark space for the first 24 -48 hours until the seeds begin to sprout. Then you may move to a sunny spot until the sprouts are at a size you'd like. Continue to rinse the jar with fresh filtered water everyday, and allow to drain. The sprouts are already ready to eat when you see the little "tails" begin to come out of the seed.
Microgreens (prefered way):
Using any container, spread a layer of soil in it and spread a generous layer of seeds on the top. After seeds are on the soil, go ahead and spread another layer on top of the seeds. Gently water the seeds. Cover with a dome, or plastic wrap. Water when the soil feels dry to touch. Remove or plastic cover when sprouts begin to grow about an inch tall. Allow to green up in the sun or under a grow light.

Prep time:
Cook time:
Total time:
Servings:
Serving size:
Meal type: Lunch, Dinner, Sidedish, Appetizer, Raw
Special Equipment needed: growing systems as indicated in blog and list