Make Your Own Beef Bone Broth
Make Your Own Beef Bone Broth
Some links are affiliate links, which means I make a small commission at no extra cost to you. See more info here.
There is a TON of information out there, on the benefits of bone broth. However, there is not a lot of consistency on how to make your own beef bone broth. There are a lot of different tastes and ways to create the perfect beef broth I suppose. I decided to document how I make my broth, simply because it seems to capture the best of all of the information that I have read, and, it is a little bit quicker. Even if you decide not create bone broth in the same way that do, I would hope you will see that making your own broth is far superior than what you can buy in the store. Plus you will get the added benefits of the nutrients, knowing where it comes from, and appreciating the process to what it takes to make good food!
Make Your Own Beef Bone Broth
For starters, I like to use the InstaPot. Many folks who make broth on the stove will tell you that they cook broth, sometimes for days. The InstaPot has become a real times saver. I can still get the gel-like substance at the end, and that is the important thing! If you go to a farmer to get your beef, I’d suggest asking them for bones. The source is very important! I get my bones from the people who sell us our grass fed cow. They give us all of the bones we need.
When I make my broth, I rinse the bones, and place them into my InstaPot. Usually it is about 4-5 bones. I will cover the bones with water, being careful not to fill it to the maximum line. I will start out by boiling the bones for 5 minutes in the InstaPot. I do this by pressure cooking and setting the pot for 5 minutes. After the bones cook, allow to let the pressure cooker naturally release for at least a half hour or so. You can release with the valve, but please look at the InstaPot instructions before doing this. This blog is not to show you how to use the pressure cooker, but just to document how I cook my broth.
After the bones have been boiled, I will take the bones out with a tongs, and place onto a shallow baking pan, such as this one, and bake for 15 minutes at 450 degrees. Then, I put the bones back into the broth from the initial boil.
Variety of Ingredients
Adding vegetables and apple cider vinegar will happen at this time. I like to add onions, carrots, thyme and maybe some celery. I try to keep it simple, as the flavors can sometimes overpower the taste of the broth which could affect the other recipes you put the broth into. Garlic is a wonderful element to add when I have it fresh, along with tumeric. Again, you may want to experiment with flavors.
The InstaPot setting will come up as “2 hours” when I push bone broth. I like to cycle through this process 3 times. Sometimes I will only cycle through it two times and let the broth stay sealed in the pot overnight. When all of the cooking is complete, allow to cool. Strain all of the contents in the pot. I did not stress that in the video.
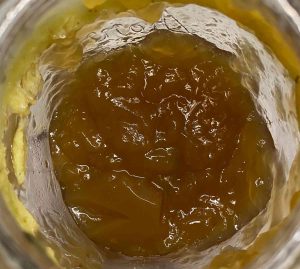
When the broth has completely cooled or if you put the broth in fridge, it will look a bit like gelatin. This is good. Gelatin-like texture is the end result we are looking for.

As an option, pour into muffin molds and place in the freezer for a couple of hours, then put them loosely in a large bag for a final freeze. This allows for single serving bone broth. Also, I will freeze quart jars with broth (leaving an inch of space on the top) for soup base recipes.
Chicken Broth
For chicken broth, the process is the same for the Instapot, however I do few things differently. First of all, I do not boil or bake the bones in advance. I add peppercorns to the broth and sometimes change the herbs. The outcome should be the same as far as the consistency of the broth when it cools. Chicken broth will often not need to be cycled through as much as the beef.
Equipment used:
Apple Cider Vinegar or make your ACV
_ _ _ _
Whether therefore ye eat, or drink, or whatsoever ye do, do all to the glory of God.
_ _ _ _
This is a great article on bone broth … westonprice.org.
I decided to document how I make my broth, simply because it seems to capture the best of all of the information that I have read, and, it is a little bit quicker. Even if you decide not create bone broth in the same way
Ingredients
grass-fed beef bones
onions
other vegetables of choice, such as carrots, herbs, parsnips, celery, tumeric or garlic
Instructions
1. Rinse the bones, and place them into my InstaPot. Usually it is about 4-5 bones.
2. Cover the bones with water, being careful not to fill it to the maximum line. I will start out by boiling the bones for 5 minutes in the InstaPot. I do this by pressure cooking and setting the pot for 5 minutes.
3. After the bones cook, allow to let the pressure cooker naturally release for at least a half hour or so. You can release with the valve, but please look at the InstaPot instructions before doing this. If you boil on the stove, keep the water.
4. After the bones have been boiled, I will take the bones out with a tongs, and place onto a shallow baking pan, such as this one, and bake for 15 minutes at 450 degrees. Then, I put the bones back into the broth from the initial boil.
5. Add onions, carrots, thyme and maybe some celery. Add apple cider vinegar.
6. Pressure cook for 3 hours. Allow to cool. Open and add more vegetables if desired. Repent for another 6 hours and allow to cool naturally or sit in Instapot overnite without opening the cover.

Prep time: 15
Cook time: 6
Total time: 8
Servings: 12
Serving size: 1/2 cup
Meal type: Breakfast, Lunch, Dinner, Sidedish, Appetizer
Special Equipment needed: InstaPot, shallow baking pan and tongs

