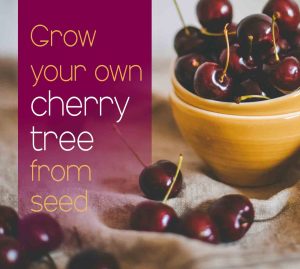
Growing a Cherry Tree from Seed
Growing a Cherry Tree from Seed
Did you ever bite into a delicious cherry and wonder how you could be growing a cherry tree (from seed) yourself? If you have ever wondered what or how, you’ve come to the right place.
The process (from the first sprouting of the seed to the finding a piece of fruit hanging on the branch) could be ten years. Sorry to disappoint but I wanted to get that out of the way. However, the benefits of being able to see the process of helping something grow from seed to a mature tree is a huge part of why LifeintheGreen.House exists!
This blog post will attempt to show you instructions I used with my own cherry trees that are still in progress. These are the steps I used to create 3 seedlings.
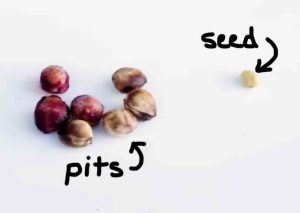
Growing a Cherry Tree from Seed – Getting the pits
When you eat a cherry, the pit that you spit out is the very seed that you work with. It has a hard shell around it. In my opinion, extracting the seed from inside the hard shell was the toughest part. I used a small pliers and snipped the very top of the hard shell. When you snip the top of the pit, there will be a really tiny seed inside. This is what you want to use for the rest of this process.
It’s probably a good idea to start as many as you can. Sometimes it’s easy to break open the shell and damage the seed without realizing it. If you end up with a lot of seedlings to work with, you can always give some away!
Place the seeds (shells removed) into a glass of clean water for 4 hours or until seed drops to bottom of glass.
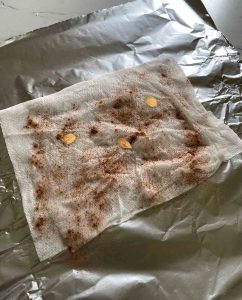
After the soaking the seeds can now be placed in a damp paper towel (not dripping wet but thoroughly saturated). Sprinkle a little bit of cinnamon on top of the seeds in the paper and fold to cover the seeds. Wrap the paper towel in tin foil. It’s a great idea to mark it with a name and a date. You will leave it in the fridge for a long time (possibly 2-1/2 to 3 months). During this refrigeration time, the seed will start to germinate. It will start to sprout or grow a tail.
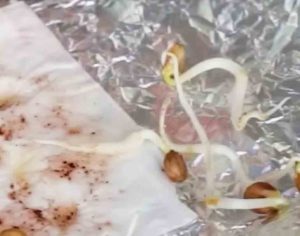
Planting the Cherry Seeds
When the seed is ready to plant, it will have a small tail (about 1/2″ long or more). I think I let my seed sprout about 3/4″ before I planted it. This photo isn’t the greatest, but is shows the tail.
Carefully plant the seed and sprouted root into a 4×4″ pot and cover with dirt, leaving the seed slightly at ground level. The root or sprout part will be going into the dirt first. Pack dirt around the seed and sprout, keeping the seed covering just barely poking up from the dirt. Water. Place pot into a sunny area.
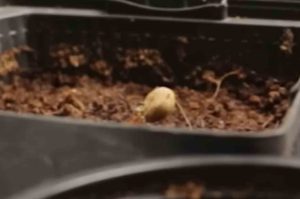
seed planted with head popping up and tail pointing down in the ground
Continue to grow in this pot until plant is about 6″ or more. Then carefully transplant to a larger pot. I did not transplant my tree into the outside yard until the seedling was about a year old.
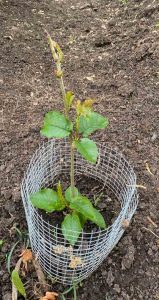
cherry seedling at 2 years old
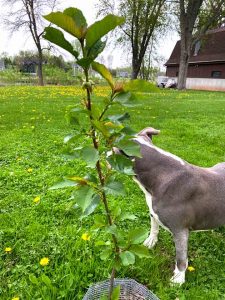
cherry tree at 3 years
Depending on where you live (zone), you might want to research the best time of the year to plant your seedling. The zone I live (Wisconsin) suggests I would have the most success planting seedlings in the fall. Allow at least a month before the first frost, if possible. If you live in a colder climate, wrap the base of the tree in burlap to keep mice and rabbits from chewing at the base of the tree.
Equipment that may be helpful:
Gardening gloves (these are awesome)
Plant Propagation Station for root sprouting
Some links are affiliate links, which means I make a small commission at no extra cost to you. See more info here.
Did you ever bite into a delicious cherry and wonder how you could be growing a cherry tree (from seed) yourself? If you have ever wondered what or how, you’ve come to the right place. The process (from the first sprouting of the seed to…